
A custom subdomain lets your brand share helpful information (like FAQs and booking links) directly under your own website address, for example, context.yourhotel.com. Once it's set up, your updates to the context/knowledge base (curation) are updated in near real-time and your content stays up to date automatically, with nothing for your team to maintain.
Step 2: Verify Ownership
This guide walks you through the setup in three simple steps.
Before You Start- You'll need access to your domain provider account (such as GoDaddy). This is where your website's address is managed.
- You can only set up a subdomain under a domain your brand actually owns. If you're not sure who manages your domain settings, check with your web team before starting.
- The setup itself takes about 10 minutes. After that, it can take anywhere from a few minutes up to about an hour to fully go live everywhere in the world.
- Choose Your Subdomain & Properties — Pick your subdomain name and which hotel properties it should cover.
- Verify Ownership — Confirm to Bonafide that you own the domain.
- Connect It — Point your subdomain to your new content.
Log in to your Bonafide portal and go to the subdomain setup page.
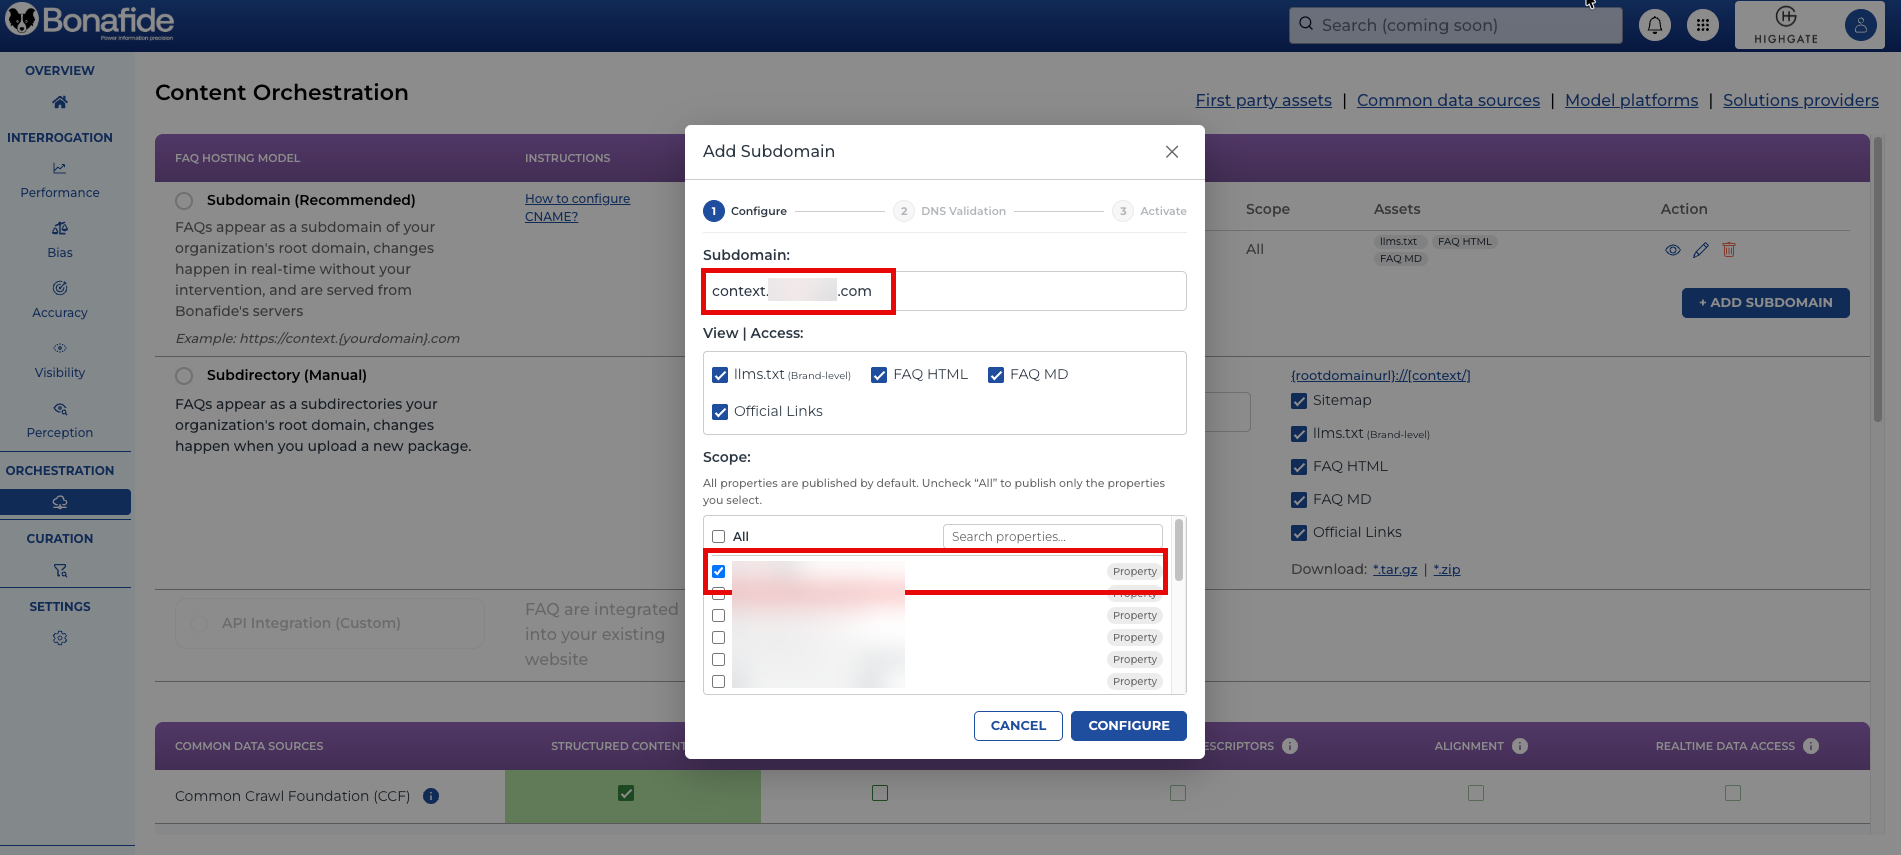
- Enter your subdomain address. We recommend the format context.[yourhoteldomain].com.
- For example:
- If your hotel domain is besthotels.com please use context.besthotels.com as your subdomain.
- If your hotel domain is biggerhotelsarebest.org then your subdomain is context.biggerhotelsarebest.org
- Under Scope, choose which properties this subdomain should include:
- Select All if it applies to your whole portfolio (best for creating a subdomain for management companies, ownership companies, or hotel brands domain)
OR
- Check individual properties for a location-specific subdomain such as your hotel’s vanity website
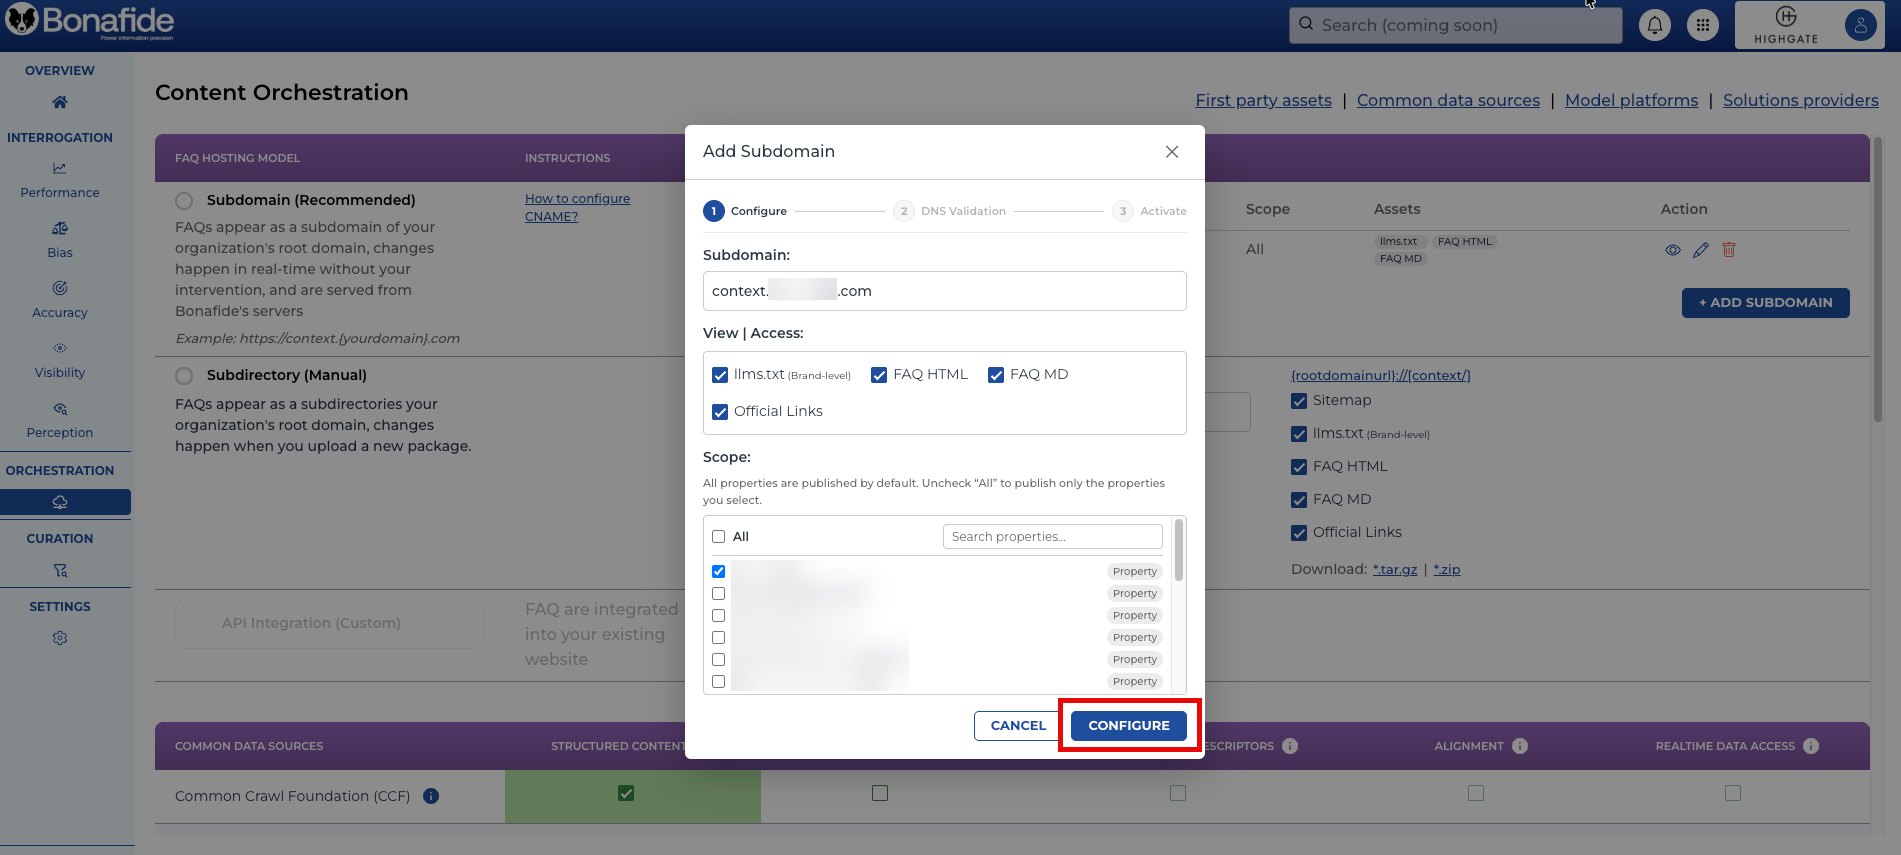
- Click Configure.
Step 2: Verify Ownership
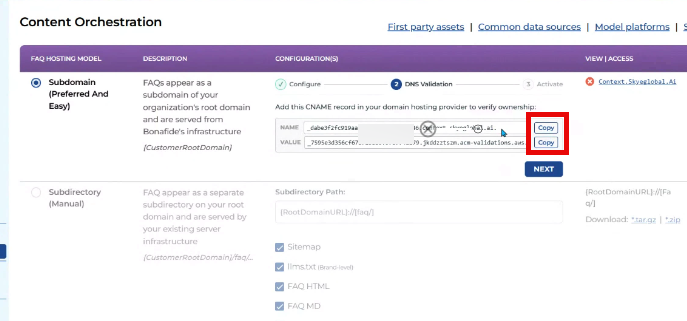
Bonafide will give you a code to prove you own the domain.
- Copy the Name and Value shown on screen.
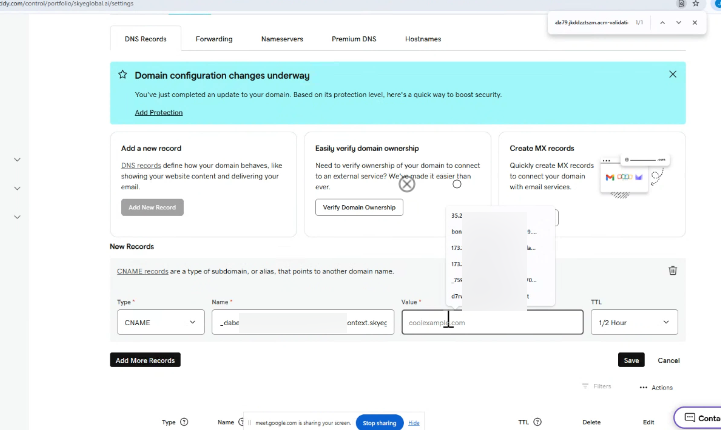
- Log in to your domain provider (like GoDaddy) and go to your DNS settings.
- Add a new CNAME record using that Name and Value, then save.
- Return to Bonafide and click Next.
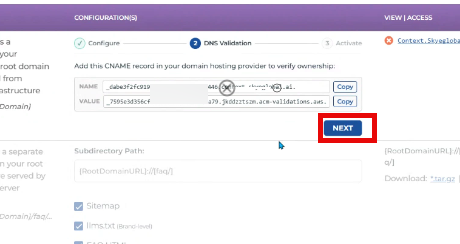
Once ownership is verified, Bonafide will give you one more code — this one connects your subdomain to your live content.
- Copy the new Name and Value shown in the portal.
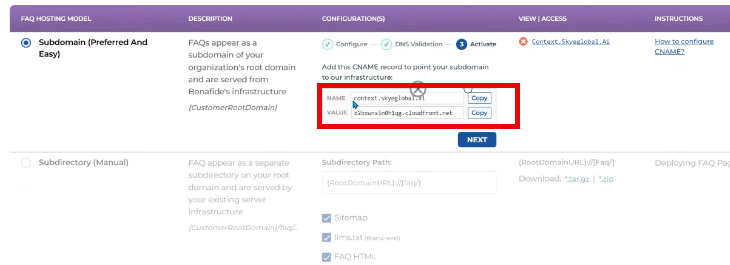
- Go back to your domain provider and update that same record with the new Value (or add it as a second CNAME record if instructed).
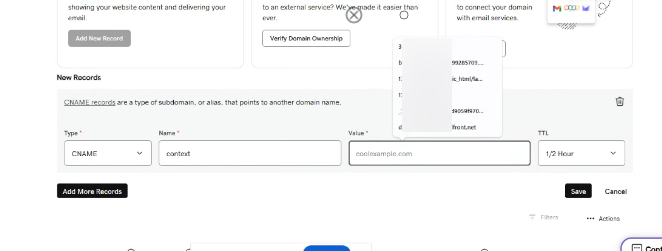
- Save the record.
- Return to Bonafide and click Save or Complete. A green checkmark will appear next to your subdomain once it's active.
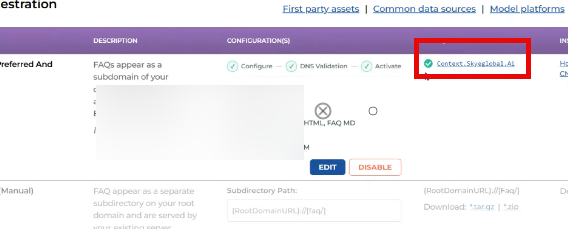
Once you've saved your settings, your subdomain will go live gradually as it updates across the world:
|
Region |
Typical Wait Time |
|---|---|
|
United States |
Immediate to 5 minutes |
|
Rest of the world |
15 to 60 minutes |
Questions or need a hand? Reach out to your Bonafide support representative by emailing support@bonafide.ai.